Hand Tool Headlines
The Woodworking Blogs Aggregator
“Glory to God in the highest heaven, and on earth peace to those on whom his favor rests.” - Luke 2:14
Be sure to visit the Hand Tool Headlines section - scores of my favorite woodworking blogs in one place.
Hand Tools
Revisiting the QRS-Tree-UV Design
Featured on the front page of the Heritage Crafts Association
A feature on the front page of the Heritage Crafts Association, for all of our hand tool work shown there.
A Voice for Craft - Heritage Crafts |
A direct link to the page.
Jon Bayes, Maker at Heritage Crafts |

Also, this week a date has been set for the exhibition at Birdwood House, Totnes for the same stuff; put the date in your diary and come along and show support; 11-18th July 2026. All the furniture and woodworking demonstrations, obviously!
And in other exciting news, my welcome pack from the Guild of Master Craftsmen arrived, replete with stickers for the van.

On Safety: No Risk, No Learning
One of our family’s favorite children’s books is called Very Worried Walrus. It was part of the Sweet Pickles books published in the late 1970s. Each book featured an animal character (such as Moody Moose or Responsible Rabbit) whose all-too-human foibles got him or her into trouble. Some of the stories are better-conceived than others, but the story of Worried Walrus is perfect. If you ever find a used copy, get it.

The premise of the story is that Walrus is about to ride his bike, but he is worried about all the things that might go wrong. His companion, Positive Pig, being of an optimistic disposition, encourages him to try anyway. Nearly the whole book is taken up with Walrus spinning out a tale of mishap upon mishap that ends with him being nearly drowned in a river and trudging miserably for endless miles at night in the rain. Of course, it’s all in his imagination, and once Pig shakes Walrus out of his self-inflicted nightmare, Walrus reluctantly gets up on his bike, starts riding, and immediately crashes. He gets up, dusts himself off, and realizes that he is fine–and that’s where the book ends.
It’s an insightful, funny lesson about the senselessness of what we now call catastrophizing. And the story has proved to be a reliable guide as I have considered the best approach to safety in the workshop, especially when I have gotten my kids involved and taught them to use my tools.
Periodically I have published articles that feature my kids participating in the craft. And every time–and I mean every time, aside from this blog–I have published an image of one of my kids doing woodworking, some well-meaning grown-up has wagged a virtual finger while providing a mini-lecture on safety.
“Shouldn’t that toy box have a soft-close support for the lid so the kids’ fingers don’t get slammed in the chest!?!”
No, sir, it shouldn’t. The kids know the lid is heavy, and they know better than to let their fingers get caught in it. Same as you. How dumb do you think my kids are?
“Shouldn’t that child be supervised while she uses those tools?!?”
Sir, where do you think I was when I took the picture? I was standing right there. Do you think these pictures just take themselves?
But my favorite safety-first reaction was when a nationally-circulating woodworking magazine ran a picture of my kids using handsaws and eggbeater drills, and one reader wrote in chiding me for not having my kids wearing safety glasses.

Sir, have you ever actually used tools like these? When was the last time you were sawing a board by hand and had a wood chip fly up and hit you in the face? How often does an eggbeater drill spray dust in your eyes? What possible use would safety glasses be in an environment like this? Do you wear steel-toed boots when picking up a package from your front porch? Do you wear welding gloves when pouring hot coffee–you know, just in case?
(My actual answer to the letter was a little more diplomatic, but that’s what I wanted to say. I feel better now. Thanks for listening.)
That letter in particular got me thinking not about injuries that could occur to my kids but ones that have actually occurred to them. I made two quick lists, one of things my kids have gotten hurt doing, and another of things my kids haven’t gotten hurt doing:
My kids have hurt themselves while…..
- Walking down stairs
- Walking up stairs
- Closing a door
- Skating
- Getting in the van
- Drinking milk
- Cuddling the cat
- Playing soccer
- Jumping on the trampoline
- Playing on a Nintendo Wii
My kids have not, however, hurt themselves while…..
- Shooting a bow and arrow
- Tending a campfire
- Sawing boards
- Handplaning boards
- Using an electric drill
- Using a sharp carving gouge
Just like everybody else, my kids have hurt themselves while doing ordinary, everyday activities, yet not once has the injury been debilitating or life-threatening. My kids actually have a superb safety record in the wood shop. We’ve had a few cuts that required Band-Aids, but that’s it.
That’s because they know the tools are sharp. When you use tools regularly and in the proper manner, you develop a respect for what they can do–both to the workpiece and to you. I remember some years ago I had ordered a new blade for a hand plane. My kids noticed that the the blade was wrapped up with paper announcing “Caution! Sharp!” I could practically hear the kids rolling their eyes. “Of course it’s sharp!” they said. “It’s a woodworking tool!”
I am not saying that I would hand a sharp carving chisel to just any 8- or 10-year-old. Children have to be gradually introduced to tools of all kinds if they are to learn to use them properly–which includes using them safely. In our house, age 10 was a rite of passage: that’s when each child got his or her first pocketknife. It’s the smallest Swiss Army Knife with a little blade, a file, and scissors. Carrying that tool around gets them used to using sharp blades to solve little real-world problems like opening boxes and snipping threads.
My wife and I also taught them how to handle pots and pans on a hot stove. When they were preteens, we assigned each one to be a kitchen assistant one night a week. That included helping with food prep, cooking, and cleanup. Now as teenagers, they can each cook a whole meal–and wash the dishes afterward–totally unsupervised.
When they were younger, my kids were shocked to learn that some of their friends still weren’t allowed to use the stove. I know their parents were just trying to keep their kids safe, but they’re also depriving their children of the opportunity to learn real-world skills. If people don’t learn to cook or clean or fix things as kids, then when are they going to learn these things at all? When they’re as big as we are? By then it’s far too late. The body may be “big enough,” but the motor skills required to deftly flip a pancake or drive in a nail won’t be there unless the skill has been practiced already. Instead, these young adults will have learned that “I don’t do that. Mom and Dad do that for me.” It’s called “learned helplessness,” and it’s debilitating.

I have discovered that many of us adults are pretty poor judges of relative risk–telling the difference between things that look risky but aren’t vs. things that don’t look risky but are likely to cause damage. I know parents who wouldn’t let their kids touch a pan on a hot stove, but they’ll give their kid a smartphone and allow hours of unsupervised access to the internet and social media. But let that kid try to saw a board in half with a handsaw, and we immediately run up and try to put safety goggles on him.
I promise I’m not an advocate of free-range parenting. I’m just not into smothering children. I want my kids to grow up into mature, responsible, independent adults who know how to use tools to solve real-world problems. Learning how to do that involves taking little risks here and there. No risk, no learning.
When I’m deciding when to allow my kids to take risks, I have found it useful to think through the worst-case scenario. Not in an “Oh-my-gosh-that-looks-so-dangerous!!!” way, but in a “what is really the worst that is likely to actually happen?” way. In other words, given the laws of physics and the tendencies of human nature, what is the worst thing that could go wrong here?
At the stove, it’s a burn, a cut, possibly some broken glass–nothing that you or I haven’t had happen to us in our own kitchens from time to time, and nothing that first-aid can’t take care of. It’s the same with most hand-powered tools. With a hand saw, for example, it would be very difficult to inflict an injury on yourself that couldn’t be treated with a Band-Aid. A chisel used inappropriately could send you to the ER for a few stitches–and I know because I’ve done it to myself! But that’s about the worst accident that’s likely to happen.
There are, of course, other kinds of woodworking that are far more dangerous, like ripping thin boards on a table saw or cutting up a fallen tree with a chainsaw. Those are activities that, if something goes catastrophically wrong, could leave you permanently disabled.
Then again, so can driving a car. But somehow, I’m guessing that if I posted a picture of a 15-year-old kid using my chainsaw (even with proper safety gear) I would get a few safety-mongers wagging their fingers, even though that same kid can be legally allowed to guide a 1-ton piece of metal at the rate of over a mile a minute down a concrete path within mere feet of other, similar machines, many of which are being operated by people who could well be texting or drunk–as long as I’m sitting next to her.
In reality, we take reasonable risks like driving and cooking every day because we know those activities are worthwhile and necessary, and because we have developed the skills to do these things fairly safely. We didn’t learn those skills by avoiding those activities. At some point, we had to put the car in gear. We had to turn on the stove. That’s why I think it’s really important for kids to grow up using basic tools of all kinds: hammers and nails, drills and screws, saws and hatchets, wrenches and screwdrivers, without grown-ups trying to wrap them up in unnecessary safety gear. They also need to know how to use pots and pans, spatulas and kitchen knives. And they need to know how to use that most basic tool of all–fire. Because soon they will grow up and need these skills, and I won’t always be there to supervise them.

Life is harder than it looks. Cooking, woodworking, even just tending a fire–these things aren’t easy. When you first start building fires, you will be surprised that the trick isn’t usually to keep it from spreading and burning down the whole neighborhood; the trick is to keep it going at all. On a screen, a few swipes or taps or clicks in the right order will usually get you the results you want, whether it’s the image of a fire onscreen or a fast-food meal delivered to your doorstep. But if you want a real fire or a real meal, you’ve got to learn to use the tools yourself. No risk, no learning.
Take something as basic as flipping a fried egg in a skillet. It’s a simple thing, but it takes practice with tools that, if used inappropriately, can hurt you. Because the egg will not simply conform to your will just because you want it to flip. It seems to me that we are raising a generation of kids who think that tasks are supposed to be easy, that the egg is somehow going to flip by itself–or that Mom will always be there to flip the egg for them–or that flipping an egg is as easy in real life as it was on that cute restaurant game they played on the iPad as kids. But in real life, if they want a nicely cooked egg, they’re going to have to spend some time right next to a hot stove burner.

What’s the worst that is likely to happen if we let them try cooking over a hot stove? Maybe a burn or a cut.
But what’s the worst that is likely to happen if we don’t let them try to cook or use a sharp tool or light a fire? A lifetime of dependence, an irrational fear of minor injuries, and a complete lack of real-life skills. I don’t want to run the risk of my kids not learning how to cook meals or do simple household repairs, even if that means we go through a box of Band-Aids every so often.
You and I are going to disagree about exactly how much safety to impose on our kids, and that’s okay. Families are different, and kids are different from each other. I’ve known 8-year-olds that I would trust with a chef’s knife and 16-year-olds that I wouldn’t trust with a Q-Tip. You have to use reasonable judgment in these things.
What I’m asking for here is that we apply the virtue of moderation to our sense of safety. Of course we should take reasonable safety precautions, but that doesn’t mean that all precautions are reasonable. Some are unreasonable. Reasonable safety precautions are those that are focused on preventing the most common and the most catastrophic accidents, and that allow the work to be done in a reasonably effective and efficient way. There is such a thing as being too safety-conscious. You know you’re trying to be too safe if (1) you are trying to protect yourself or others from threats that don’t actually exist, or if (2) your safety precautions are more likely to cause harm than to prevent it.
A classic example is the guy who insists on wearing work gloves while using the band-saw. Wearing gloves sounds safer than sending a board through a moving blade bare-handed, right? Wrong. Because the moment that blade hits the glove, it will pull the glove down into the machine and probably pull your finger down with it. Better to use the band-saw bare handed and risk a few splinters or even a nick with the blade itself.
In the same way, if you’re going to teach your kids to cook at the stove (and you should), why not have a fire extinguisher in the kitchen, too? And make sure everyone knows that it’s okay to use it!
When we are learning a new skill, we all need a generally safe environment in which to take small, limited risks in which the worst-case scenario isn’t catastrophic, and in which other people aren’t constantly on the verge of panic because they are imagining everything that could possibly go wrong. No risk, no learning.

But if we allow our children to take smaller, reasonable risks in the process of learning valuable skills, they stand a good chance of growing up to be capable, independent people who can be trusted to get the job done, instead of becoming young Worried Walruses who are paralyzed with fear about all the horrible things that might go wrong if they pick up a drill or turn on the stove.
new project (three drawwer) pt XV(?)............
 |
| the original |
Here it is Frank. This is the cabinet that the two drawers were originally made for. I did something wrong fitting them and made two new ones. Still haven't found a home for this so it sits in front of the TV stand until one is found.
 |
| option one |
I kind of like this handle. It fits the scale of the drawers pretty good but I don't have a warm and fuzzy with the color. It compliments the cherry but IMO shiny brass would really pop.
 |
| hmm..... |
The shiny brass looks good. I'm glad I checked to see what I had in my hardware stash. These were the largest round knobs I had in this style.
 |
| small knob |
I thought I had more of these then I did. In fact this was the only one I had. The scale fits this drawer and it matches the other two. Saved $40 going to Lee Valley.
 |
| came today |
This is the best looking book from LAP that I have seen yet. And I got a patch too. Feeling as I do this is a good time to start perusing this.
accidental woodworker
thanksgiving 2025.......
Regular readers of my daily keyboard dribble may have noticed that I haven't been posting at my regular time. I usually post between 0600 and 0700 but lately that has fallen by the wayside. Because of the pneumonia and now a head cold when I wake up I turn over and go back to sleep.
I'm feeling better with the pneumonia but the head cold is dragging me down. I am bone weary tired all day long. I don't feel like doing anything but vegetating in my bed. I have to convince myself to get up and move. Which led to a slo mo thanksgiving for the wife and I. In hindsight we should have postponed it and did it when we both felt better.
 |
| two bottoms done |
Got the bottom on the back glued on and cooked. Bottom for the drawer installed without being dyed cherry. I thought I had some cherry min wax but I couldn't find it so I left the plywood plain.
 |
| hmm..... |
Me thinks maybe I shouldn't work when I feel like a used dishrag. I initially planed the excess drawer slip at an angle going high from the right to the left. I then had to correct that angle and you can see that I see sawed on it. I did marginally better on the left side slip.
 |
| the gap filler |
Sawed off sliver and than sanded it until it fit in the gap.
 |
| done |
Got a snug fit with the filler and I couldn't remove it so get some glue on it. So I left it in place and wicked super glue on it. This is at the front so it isn't as readily visible as if it would have beeen at the rear.
 |
| fitted |
The single top drawer easily slides in/out without any rubbing or dragging. A downside to this arrangement is the drawer may leave drag marks on the top. I'll have to keep an eye on that. Maybe waxing the bottom of the drawer will help with that?
I need knobs/handles for the three drawers. Searched Lee Valley and found a knob for the single drawer but nothing for the two bottom drawers. I put a couple of choices in the cart but before I buy them I want to look around other options.
accidental woodworker
Happy Thanksgiving (2025)!
good news and bad news.......
The good news is I spent some time in the shop today. The bad news is my wife is now sick. Thanksgiving is going to be interesting for sure. On the other side of god news, the cough is still getting better so I hope that it is pneumonia and not the C word.
 |
| notching for the back |
I had gone to the shop just to stand and look around. I unclamped the drawer and things just snowballed from there. Decided to go for as long as I could.
 |
| splitting |
The splitting went better than anticipated. Next up was planing the bottom glue on piece to fit in the notch.
 |
| sigh |
How did this happen and more importantly, how did I miss this? This will be visible so I'll have to fill it in somehow.
 |
| new piece glued and cooking |
While that was cooking I scraped the glue squeeze out from the drawer slip.
 |
| done |
Took 5 plane runs before the drawer slid in/out easily. Got a gap but there is nothing I can do to improve it. I'll have to live with it as is.
 |
| drawer front is flush |
This gave me fits. The left drawer is about 1 1/4" short on the depth. I made 4 stand offs without any of them working. The fifth set was the charm and I did that by planing them and checking until the drawer front was flush.
 |
| stand offs |
This is what kicked my arse and made feel as smart as box of pointy rocks.
I got the right drawer standoff done too but missed getting any pics of it. At this rate it will be another week before this gets done.
accidental woodworker
when will it be over?.........
I'm going into week four of feeling like crap. Yesterday was the worse. The cough is getting better. The frequency of hacking is down, the intensity is down, and I'm grateful for that. However, I now have a full blown snot locker crammed shut cold. I honestly don't know what feels worse - the cough or this cold.
I spent the entire day in bed feeling miserable. It sucks being sick but more so right before a holiday. Today's post is late because I forced myself to get out of bed and post something.
So no progress to report on the 3 drawer project but it is close to being done. Just have to feel good enough to waddle on down to the shop and do something. Maybe tomorrow I'll have pics to back that up.
accidental woodworker
Parquetry Class Day 3


The day began with smoothing the parquetry compositions, first with toothing planes, both manufactured and home-made, then followed by blocks of pumice.

The next step was to lay out a simple banding knotwork design for one corner as an exercise.


Excavating for the inlay came next, followed by cutting and fitting the elements of the design.

In the end everyone went home with examples of the techniques to apply to their upcoming projects.
If this technique interests you I hope you will join me for next year’s class on October 1-3, 2026.
new project (three drawwer) pt XII(?)............
Feeling a little better but still coughing. The cough is a wee bit better, softer, and I haven't had a coughing fit that lasts for hours. Occasionally my stomach will hurt as I cough which sucks pond scum. Not only do I have to endure the cough but also my stomach screaming arias at me. And it lingers for several minutes. I have a follow up with my PCP on the 11th of Dec and I will definitely bring it up. Until then I'll have to suck it up and deal with it.
 |
| can we say yummy in my tummy together |
Cornbread stuffing for thanksgiving and I'll be the only one eating it. My wife likes traditional bread stuffing which I don't like. I have yet to taste one that tastes good and doesn't have a mouth feel of a worn out wet sponge. I made this last year (two pans) and I ate it all.
I made this in the morning and got it out of the oven a few minutes before 1100. Of course I had to sample it - yummy in my tummy. I did forget the carrots though. I like carrots a lot but it was too late to include them. The stuffing had been in the oven for 10 minutes already when I remembered them.
 |
| bottom in the slips |
Got it dead nuts on the first try. Usually takes at least one trim before that magic happens.
 |
| sigh...... |
I split the bottom for about 3 1/2" when removing the slips and bottom from between the sides. Super glued it back together along with a half pin that cracked too.
 |
| drawer guide |
The distance from the back of the center stile to the back was 8". I made the drawer guide 4" long and glued it in place with super glue and yellow glue.
 |
| hmm...... |
I don't understand why the right drawer only goes in this far. The drawer guide is the exact same width as the center stile so WTF? This has got to be the billionth hiccup I have had to address with this project so far. After the drawer guide has time to cook I'll plane it with my bullnose plane.
 |
| hmm..... |
Nixed the rabbets in the sides and I am going with a single tail back. I'm putting the tail in the back rather the sides. I did it this way so I could put the back in without having to push one or both sides outward if the back was the pin board.
 |
| sawing the pin |
I would normally saw this from the outside face to the inside face so the fuzzies end up there. However, this is the only way to clamp the drawer to saw it. I used a dozuki so the fuzzies ended up on the inside.
 |
| clean |
I chopped all the waste from this side. None of my chisels are short enough to be used on the opposite face. Chisel fit but there was zero room to swing a mallet to whack the chisel.
 |
| good fit and it is square |
Happy to see this. I was expecting the drawer to be twisted but luck was on my side.
 |
| drawer slips cooking |
Rather then try to match up the drawer slip to the groove on the front, I left it way proud. After it has cooked I will plane the bottoms of the slips flush.
 |
| ugh |
This is not a yikes, a hiccup, a hmm...., a brain fart, or a me-steak. This is a brain dead screw up of hurrying up and wait and getting bit on the arse and drawing blood. By the way, this is not a gap but a chasm.
 |
| off cut |
This is the off cut from ripping the back to width. I'll glue this on in the AM or PM tomorrow.
 |
| homemade cranberry sauce |
Again this something that only I will be eating. I will eat the stuff in a can but this IMO is so much better. Whole cranberries, sugar, orange juice, orange zest, a little water and a splash of orange grand mariner. Yummy in my tummy. This is the only thing that is a bit tart/sour that I will eat.
accidental woodworker
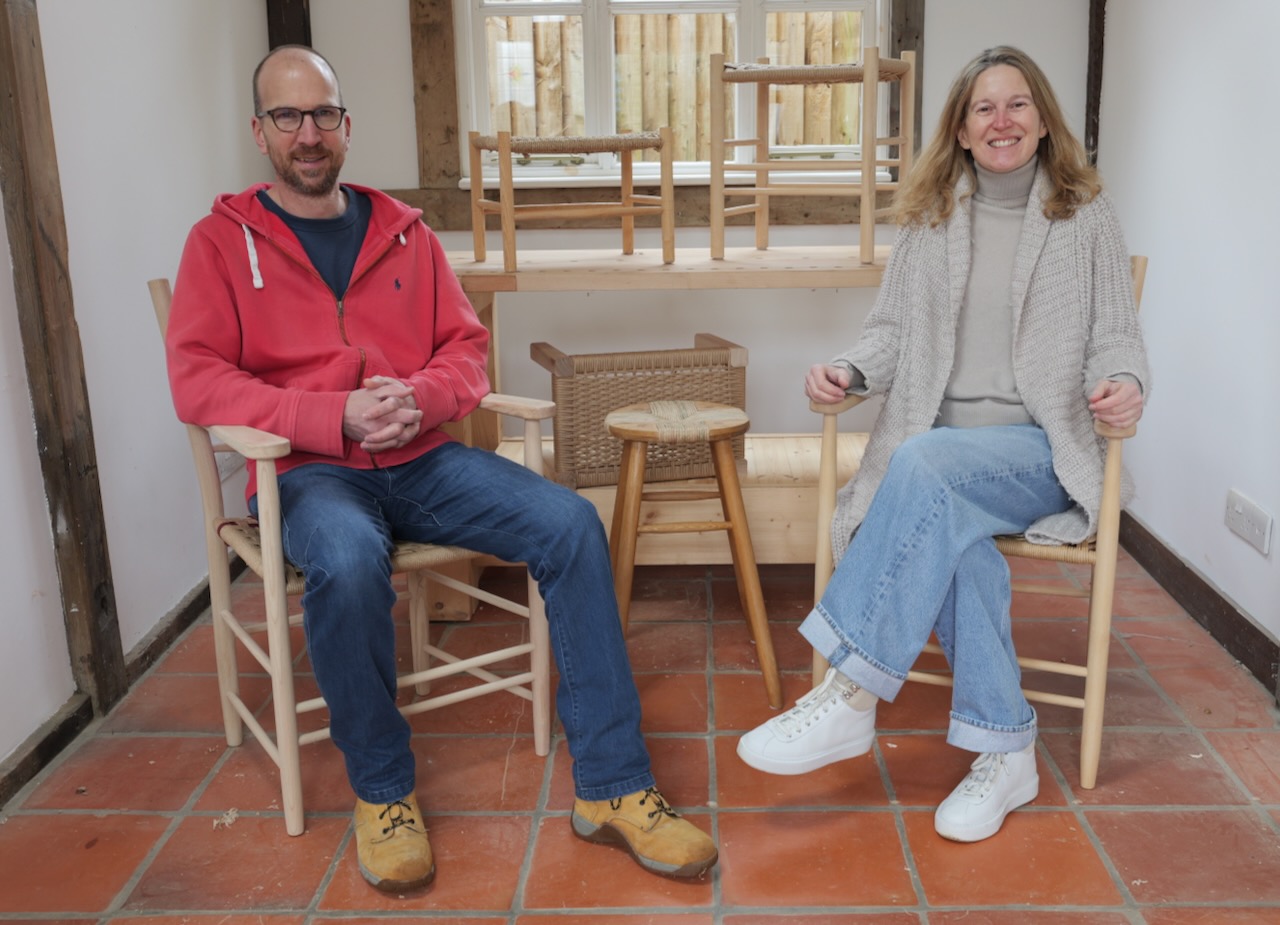
The Quiet Workshop Autumn Newsletter

We’ve had a lovely year of courses and shows, meeting new people and sending them home happy, well-fed and with a chair they’re proud of.
It’s been busy with new opportunities: we’ve taught Danish cord weaving at the Festival of Upholstery, a seat weaving class at the St.Alban’s Upholstery School and have launched workbench plans in our online shop.
Thank you so much to everyone who has come on a course, at our workshops and elsewhere. Thanks also to those who have supported us through buying products in our new shop.
Our courses start again in March but over the winter we’ve got plenty to keep us occupied: a new chair design that will be offered as a course, production of our hard finishing wax and vice screws and the launch of custom made workbenches, available from our online store. We’ll have more details of all of these in the new year.
Course Dates 2026
We’ve published the dates for our courses for 2026 – they’re all available on our website. They link through to Craft Courses for booking.
So that we don’t disappoint anyone we always run courses that have bookings; if just one person books on a particular date then that course will run. Whilst this makes no financial sense whatsoever we feel that if people make plans in advance they should be confident that they’re not going to be disappointed.
That said, we’ve scheduled over 30 courses for next season and sometimes we cancel courses that don’t have bookings a couple of weeks beforehand if they’re close to another date that’s fully booked.
If you’d like a course for a small group and our dates don’t suit you please get in touch. If we haven’t had a booking at a time that does suit you we’re always happy to move things around.
Shows – 2026
We’ve really enjoyed the shows this year and though they take out weekends during the season we find them a lovely way to meet people who are interested in our craft.
Some of these dates are provisional because not all the shows we attend have confirmed dates yet. We’ll update them on the website if they change.
- 7-10th May Living Crafts, Hatfield House, Hertfordshire
- 14-15th June Cambridge Town and Country Fair, Parker’s Piece, Cambridge
- 4-5th, 11-12th, 18-19th & 25-26th July Cambridge Open Studios – right here in Great Wilbraham
- 8-9th August Cambridge Country Show, Stow Cum Quy
- 12-13th September The Wonder of Wood Fair, Burwash Manor, Cambridge
- 30th-31st October London International Woodworking Festival, LDE UTC, Royal Docks, London
If you think there’s a craft show within an hour’s drive of Cambridge that we should attend please drop us a line. We’re always grateful for new opportunities.
Workbench plans – available now.
Thanks to everyone who has downloaded or bought paper copies of our workbench plans. We’ve had some really useful feedback on these and we are looking forward to seeing some of the finished benches.

They’re available in six different sizes: three in metric, three in imperial. But they’re not just a straight conversion. We’ve designed the imperial and metric benches around the materials most commonly available in different regions and have worked out sensible sizes so that you don’t end up with something silly like a bench top that’s six feet six and forty seven sixty-fourths of an inch!
- 1m/3.5′ – ideal for chairmaking, small and easy to store but rock solid
- 1.5m/5′ – a good sized joinery bench but every piece is manageable when setting up or moving it around
- 2m/7′ – a bench big enough for any furniture project but with a top that’s still moveable by a normal human being
These benches have been designed with five principles in mind:
- Built from easily available materials with basic woodworking tools
- Only very basic joinery skills required
- Easy and quick to set up
- Every component must be light enough to move easily around your workspace
- Rock solid; the fact that it packs down quickly mustn’t make it flimsy in use
The plans include complete cutting lists for all pieces, a suggested tool list and instructions. Eventually there will be YouTube videos. We’ve finished the introductory video and working on the next 4!
Workbench vice screws

To help you along with your workbench build we’ve started selling the vice screws that we use on our benches. You can use a metal vice attached to the top or you can get a wooden vice screw from us.
St.Alban’s Upholstery School & Studio
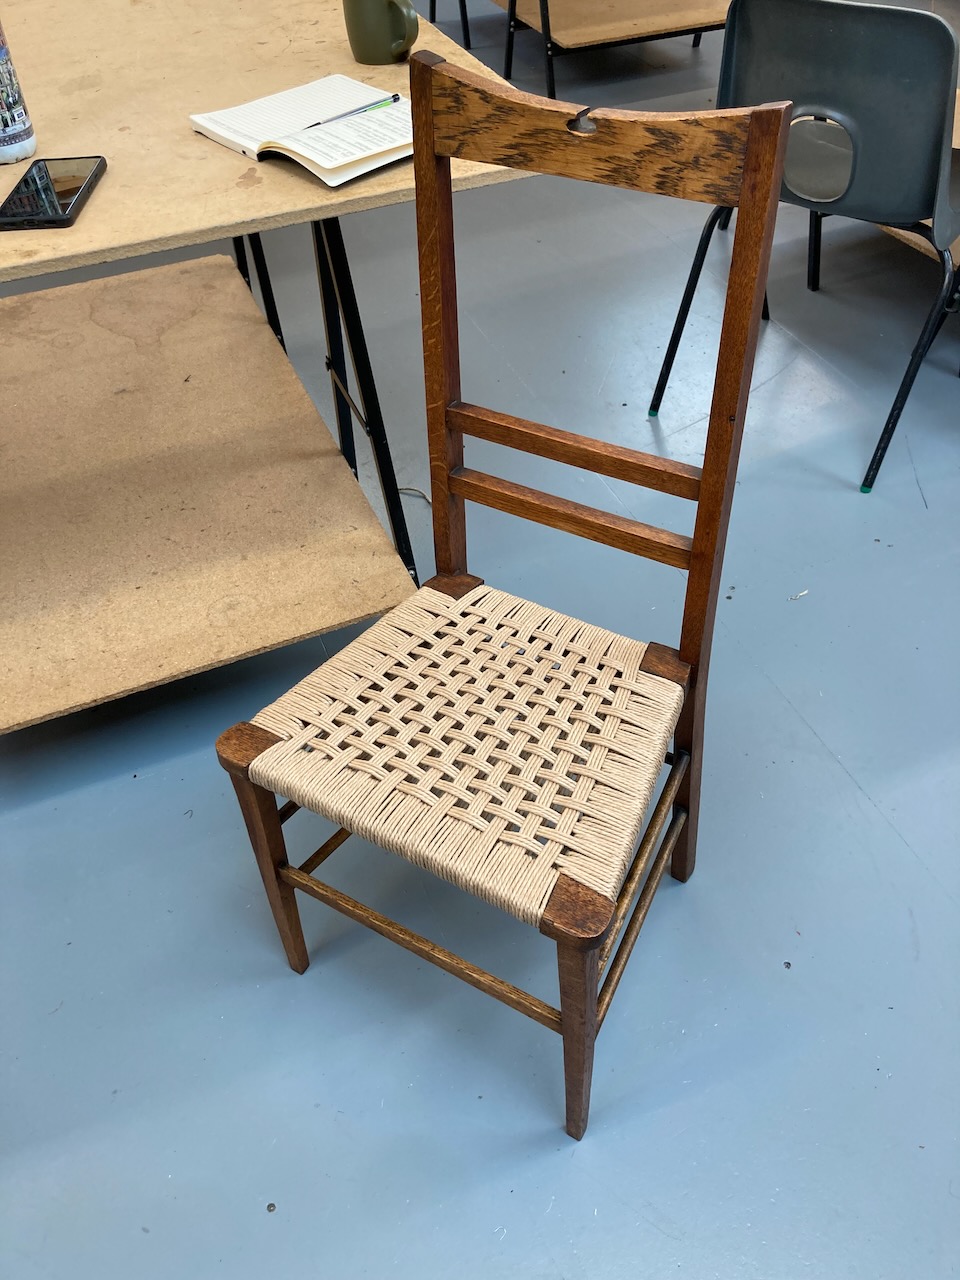
In September we taught a one day workshop in seat weaving with Danish cord and seagrass at the wonderful St.Albans Upholstery School. Participants brought their own chairs that needed a new seat and we worked out a solution for each chair. At the end of the day 8 new seat weavers went home with a completed chair.
It was a really challenging and worthwhile day. Usually we’re teaching people to weave the same seat with only a slight variation in pattern so seeing 8 different designs go home at the end of the day was very satisfying.
Nothing says you’ve done a good job like being invited back and we’re delighted to be delivering another course in January. Keep an eye on their website for details.
If you don’t know St.Alban’s Upholstery School and Studio I hesitate to point you towards their website. 5 minutes of looking at their gallery can prompt either a career change or radical rethink of your interior designs – you have been warned!
A splash of colour
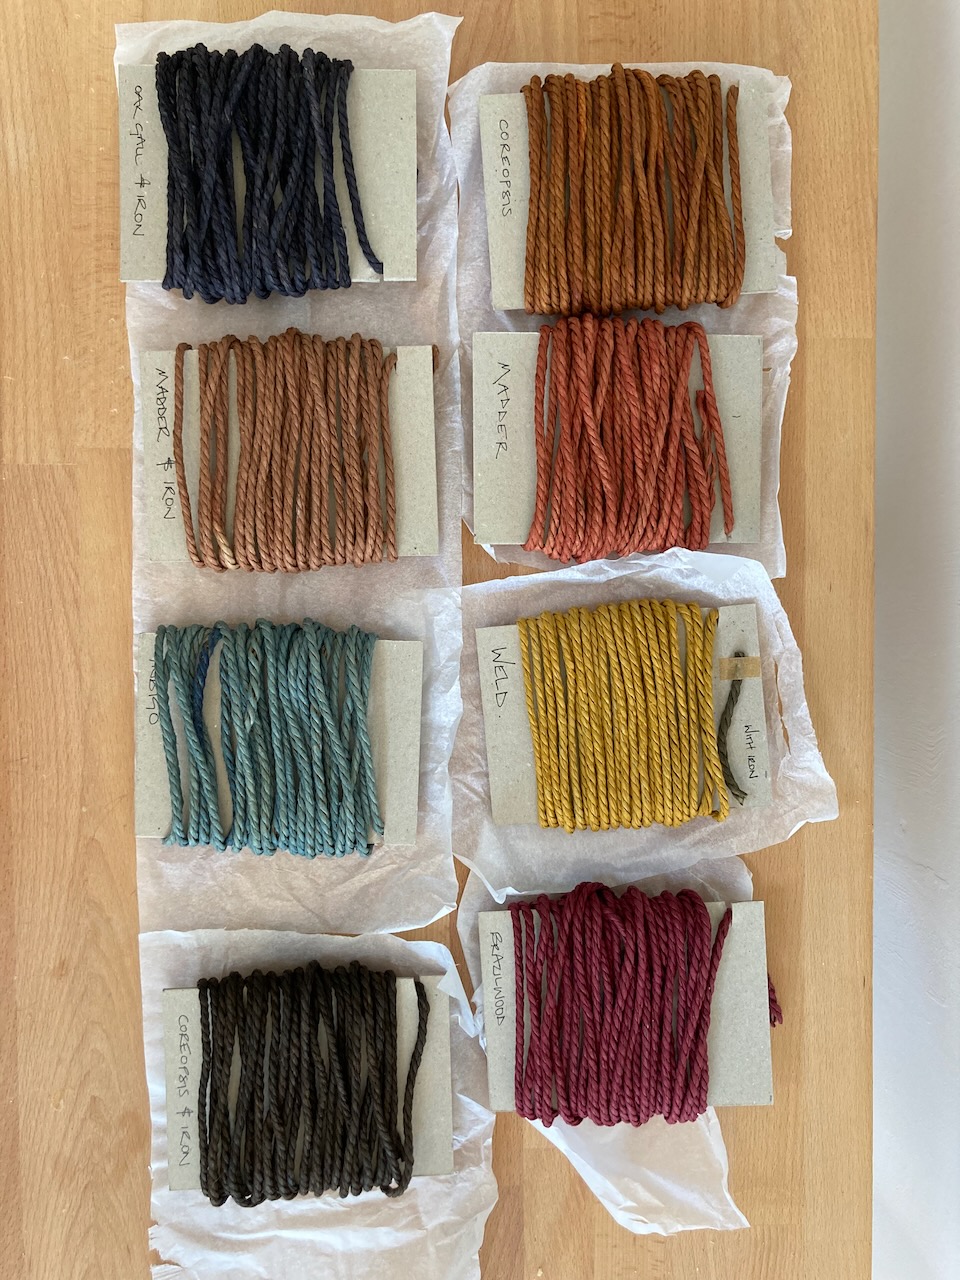
Our amazingly talented friend Jacqui Symons at Slow Lane Studio sent us some dyed Danish cord earlier in the year. We’ve been itching to weave it into a seat and finally found the time and the right chair.
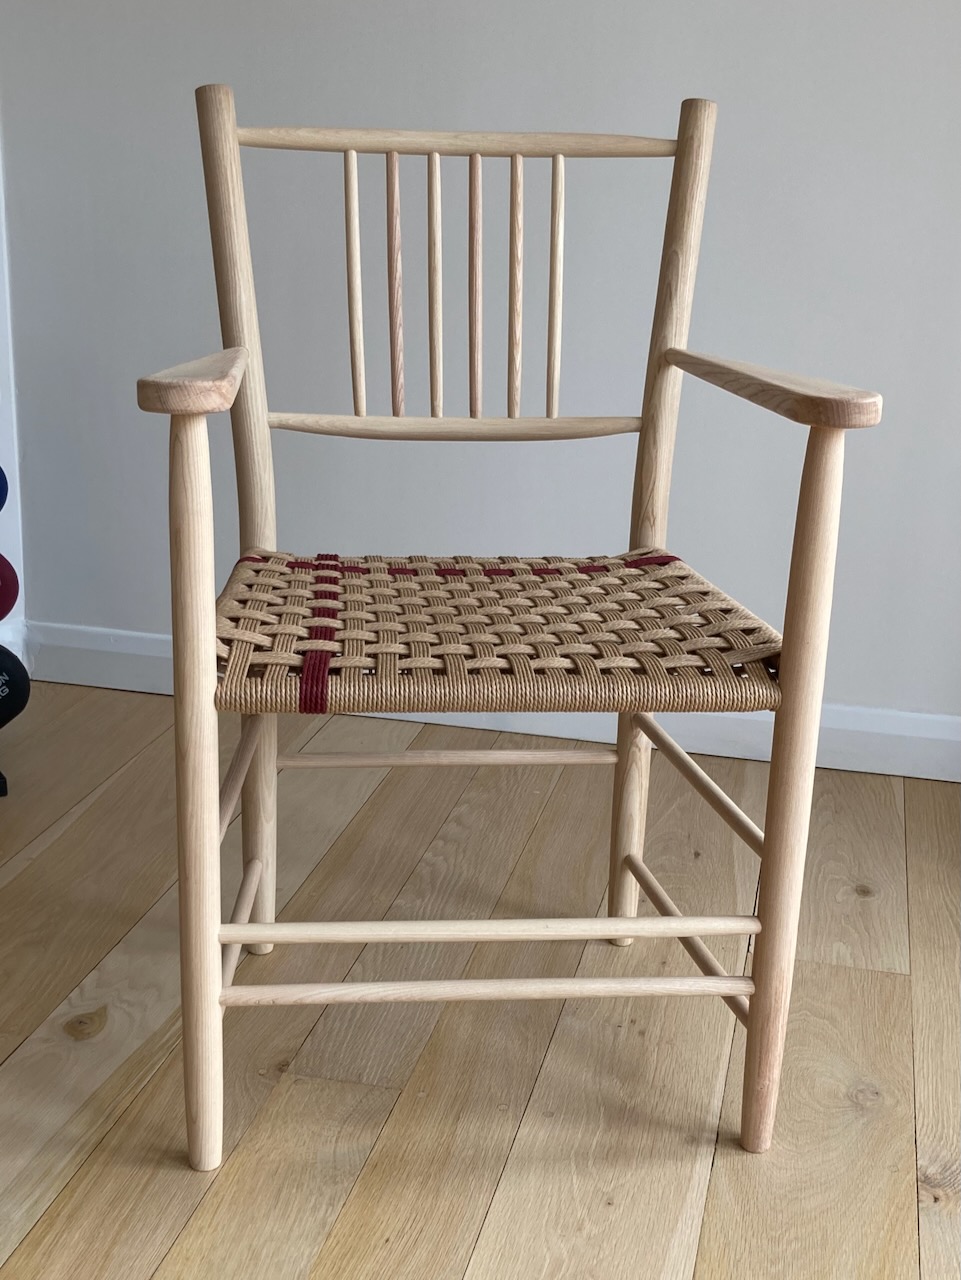
This arm chair uses cord dyed with Brazilwood. The photos don’t really do it justice. It’s an incredibly rich and deep colour and gives the light ash and muted Danish cord chair a new dimension.

We’ve got several more samples to try before we work out what to do next. It’s unlikely that it will feature on a course soon because we need to test it for colour transfer (sitting on it in light coloured trousers!) before we can be sure it’s a complete success. But for the time being we’re delighted!
Jacqui published a book recently on natural dyes and pigments. It’s the culmination of years of testing and researching and is beautifully illustrated. Available direct from her website.
Hard wax
On every course we get asked about finishes: oil or varnish, shellac or wax? We’re always very hesitant to recommend finishes to course participants because we’ve been so unhappy with what’s available. Ideally a finish should be easy to apply, hard-wearing, non-colouring and easy to repair if it gets damaged.
This is called a unicorn finish.
We’ve used lots of different finishes over the years and have had acceptable results from shellac and Osmo Polyx Raw, mixed results from oils and varnishes and disappointing results from waxes.
As a generalisation the longer a finish lasts the harder or more time-consuming it is to apply. Lots of oils and varnishes give too much orange or yellow colour to the wood. Soft waxes are easy to apply but give little long-term protection to the wood.
So several years ago we started experimenting with our own wax recipe. Most furniture waxes are soft and contain beeswax or a soft microcrystalline wax. Most use a petroleum based solvent. Most are easy to apply but offer very little longevity or protection.
But there is an alternative. Automotive and marine wax manufacturers use Carnauba wax, a natural, plant-based wax that has a higher melting point than beeswax but is much harder and longer lasting. It’s what professional ‘detailers’ use to make supercars look shiny.
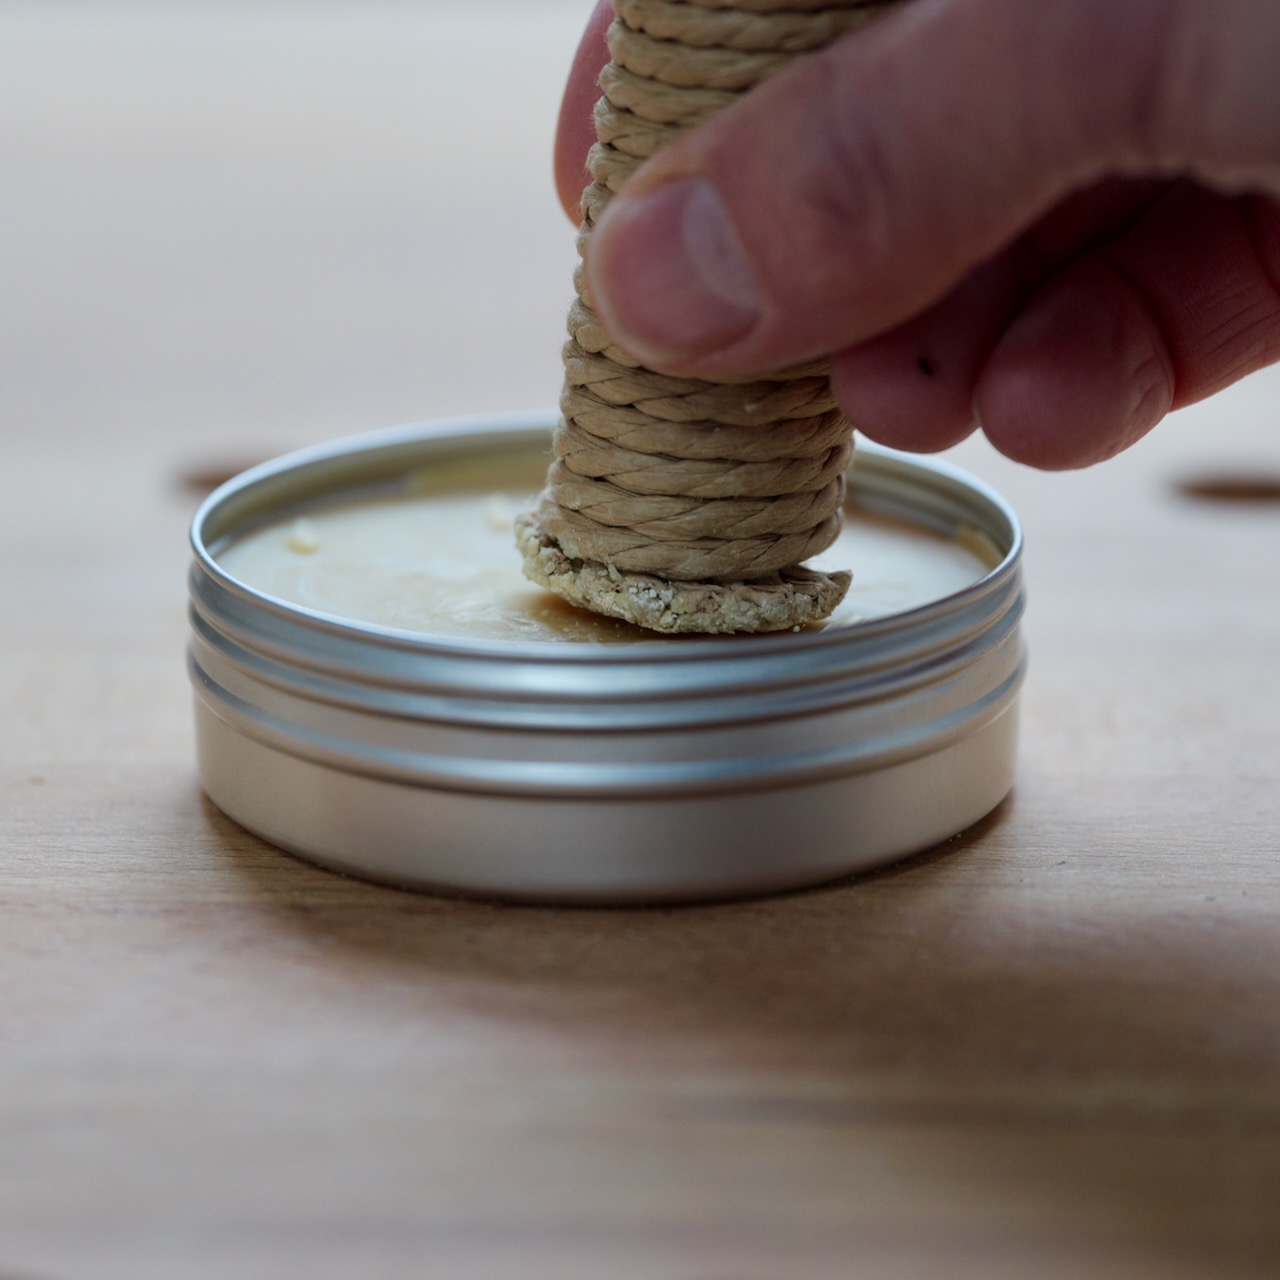
We started experimenting with a blend of Carnauba wax, beeswax and citrus oil to create a wax that is definitely a little bit harder to apply than traditional soft waxes but offers much better protection and longevity.
We’ve been using it on all of our workshop and household furniture for several years and have been tweaking the formula each time. Now we’re happy with the results.
It’s applied with either a burnisher or a grey pad, left for a few minutes and then buffed off.
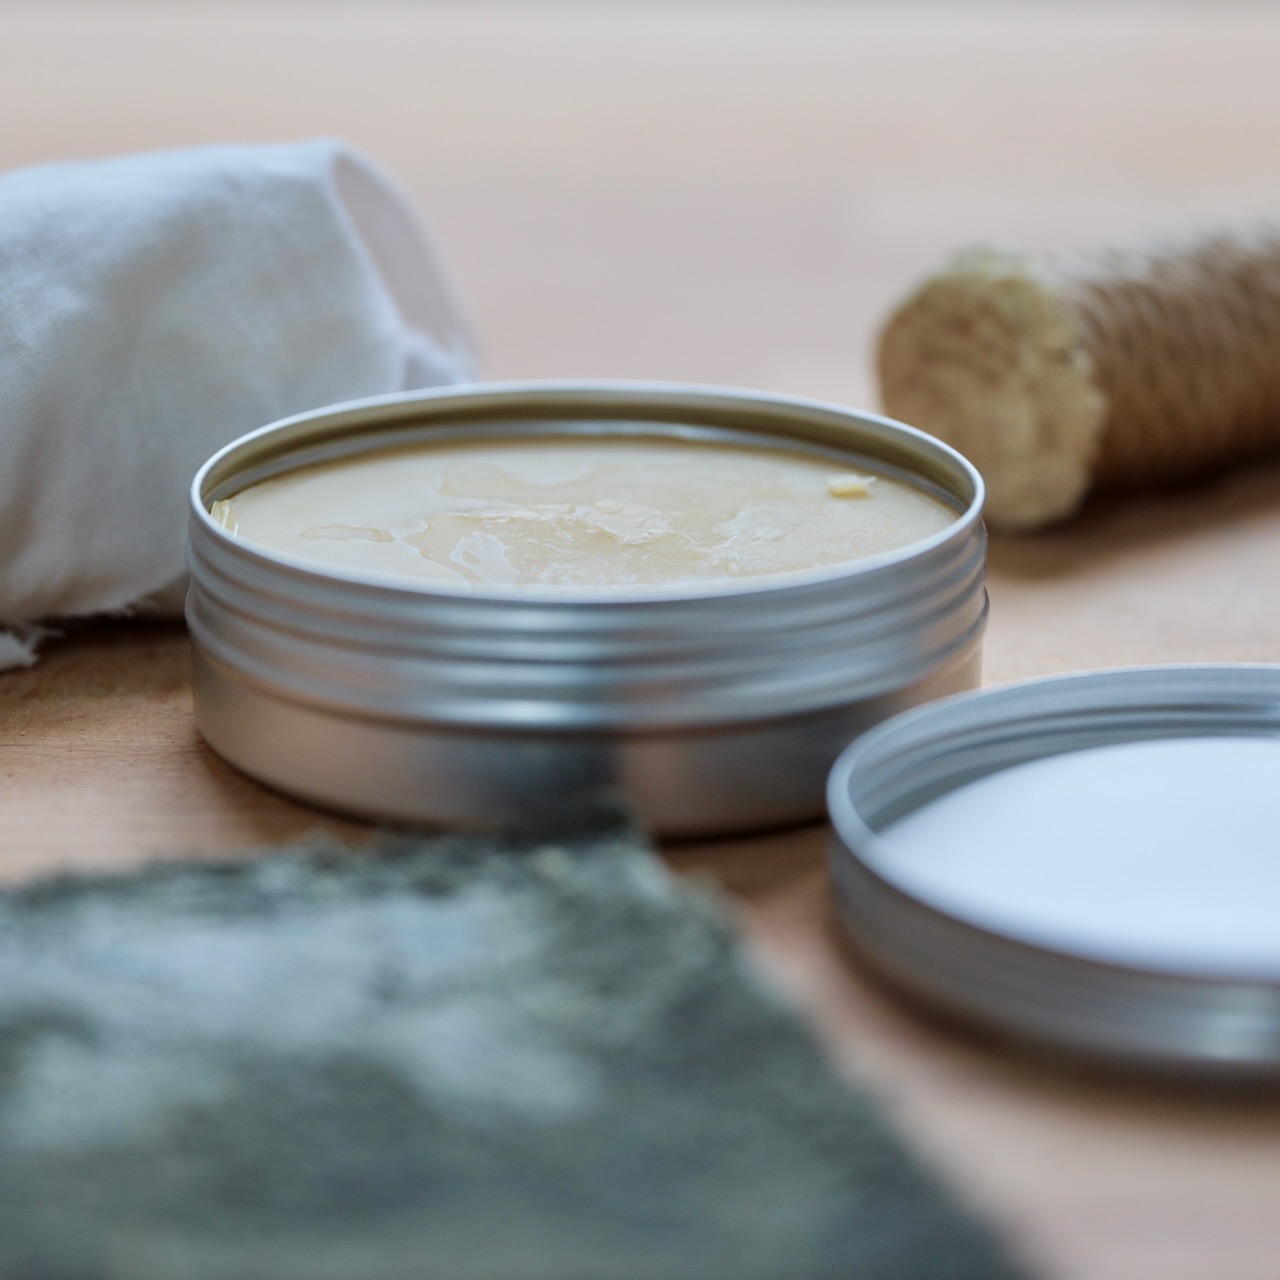
We use it on its own or over other finishes if required. It gives a soft, subtle sheen and leaves the wood feeling smooth and protected.
The huge advantage of a finish like this is that it can be applied in one coat and the piece of furniture can be handled straight away. You don’t need to leave it to dry overnight and if it starts to wear you can easily top it up without having to sand it back.
We’ve got to work out the packaging details and then we’ll be putting it up on website: look for it in the new year.
As always, if you’re interested in coming on a course and you want to find out more please give us a ring (07778 397328) or drop us an email. You can book all of our courses through the links on our website. If our dates aren’t perfect for you or you want to book for a group give us a call; we can usually work something out. Don’t forget course fees include all materials, lunch and refreshments each day.
Enjoy your time in the workshop.
StJohn & Bryony
new project (three drawwer) pt XI(?)............
Didn't sleep well at all last night. On the bright side it wasn't because I was trying to cough myself into a stupor. I just couldn't fall asleep and stay asleep. Spent most of the night watching You Tube. That really screwed my AM today. I was feeling comatose and went back to bed after breakfast. I slept fitfully until lunch and got up. Felt better but still a bit tired. Spent 4 hours in the shop and got some things done.
 |
| made the change |
I thought more about the gaps to be filled I decided to go with a half lap.
 |
| did better |
Positioned and clamped the carcass before sawing the half lap. Found out I have a kink in the saw blade. In spite of that I sawed on the knife lines without wandering out into La La Land.
 |
| initial fit |
Got a snug fit top/bottom and side to side. I still had to saw the half lap on the center stile.
 |
| handy router |
This router was the perfect size for routing the bottoms of the half lap mortises.
 |
| half tenons |
Sawed the shoulders and split the tenons with a chisel.
 |
| yikes |
Only this one was below. I had to build it up with a couple of pieces of veneer to get it a frog hair proud.
 |
| glued and cooking |
Screwed up here and put the cart before the horse. The plan was to put the back in a dado but that ain't happening now. I only noticed this after about 10 minutes after glue up. Too late to separate the sides from the front.
 |
| should work |
I think I can dovetail the back - if not I may have to make a new drawer. Or nail the back on - I should be able to put a rabbet on the back ends?
 |
| took a while |
The tails on the front had gaps. They closed up with clamps but the sides toed in almost an inch. Wedged a scrap to hold the ends square while it cooked.
accidental woodworker
Carcase saw rippeled Gidgee
New body

Some times everyone feels like they need a new body. I spent today making a new body for a moulding plane.
I bought these two at a sale. The blades cleaned up, and are useable.

There was some worm in the bodies, a sole repair on one and a broken wedge. I soaked the bodies in turpentine for several weeks, but this summer fresh worm holes appeared.
I have lots of beech, and was intending to make some new jointers with it. These two are more pressing, so they have jumped the queue.

I really enjoyed making the first one, and looking forward to making the second.

And of course, using them.
Electric Mandolin Part 2
With the body completed (for the time being), the next job is the neck. And in the video I tell you all about it.
new project (three drawwer) pt X(?)............
 |
| done - ish |
Planed and sanded. The bottom side had the tails proud of the pins. I had to plane a strong 32nd off to flush them. The carcass is basically done and I will do a final sanding with 240 before I apply the shellac.
 |
| sigh |
The drawer front isn't flush with the front. Part of the problem of using second hand drawers.
 |
| left drawer |
Left isn't as bad as the right one.
 |
| left one fixed 95% |
I left some to do after I get the center stile in.
 |
| one more swipe |
I wanted to leave some wiggle room but one more swipe erased that.
 |
| fitting the back |
Decided after seeing this to make the entire project out of cherry. I think I can do that except for the drawer bottom. That will be 1/8" plywood maybe stained cherry.
 |
| the top single drawer front |
Originally I was going to using rabbet joints for the drawer. But I made a U-turn and switched to through dovetails. Thought about using half blinds first but nixed it. The sides are frog hair over 5/16" and I didn't want to deal with something that small.
 |
| sneak peek |
The bottom left miter joint is open. Hmm..... I thought I had left this one long with lots of wiggle room.
Rethinking the all cherry thing after seeing the quarter round molding. No way you can mistake birch or maple for cherry.
 |
| my nemesis |
Scratched the bald spot for a few trying to figure this out. This short piece is short on the length. No amount of wiggle room will hide that.
 |
| the fix |
This was the 2nd sliver I sawed off. It was a lot easier to do then I thought it would be. I superglued the sliver to the short miter and then glued the bottom quarter round in place. Set it aside to cook and turned to other things.
 |
| 3 gaps |
The bottom right corner was the only one that didn't have a gap. I filled in the other 3 with cherry veneer and yellow glue.
 |
| ta da |
Nailed it on the first one. There is a very teeny, weeny gap but I can live with the smallness of it.
 |
| not too bad |
Chopping out the tail wasn't that bad. I thought I would be fighting having room to swing the mallet but that didn't happen. The hardest part of this was sawing the tail. Initially I thought I had done a bang up job but when it came time to chop it out it was different story. I hadn't sawn on the knife lines and I couldn't change that. I have tried in the past to transfer a chopped tail onto a board without any hint of success. I was already thinking ahead on how to address the gaps.
 |
| drawer guide |
I half lapped the center stile to fit the tail recesses. Used one of the errant center stiles that were short to give up the drawer guide.
 |
| hmm....... |
Gaps, top and bottom. As I was typing this I thought of doing a half lap. That would hide all these headaches. But getting back to what I came up with to deal with the gaps.
 |
| bottom |
This one is a lot better than the top one. On the top one I performed worse sawing than the bottom one.
 |
| hmm.... |
What I came up with was to make the gaps wider. Since there wasn't any other way to fix them, might as well celebrate them and make them pop. I'll fill them in after I make the gaps a little more even on both sides.
 |
| been a couple of hours |
The bottom molding had set and was a frog hair shy of being flush with the bottom of the back panel. The bigger problem than that is how will I attach this to the top of the carcass? There is the classic cross grain hiccup between the two drawer enclosures.
 |
| not perfect but..... |
This is a whole lot better - not perfect but this is at the back and won't be readily visible.
 |
| choices |
From left to right, walnut, mahogany, and cherry. The winner is walnut. Darker than the cherry and it will pop against the lighter colored cherry. But that may be changing. I'll find out in the AM when I see which way the wind blows me.
 |
| Yikes |
What gremlin is responsible for this hiccup? Unfortunately for me this hiccup is at the front left bottom. This is going to be a wee bit tricky to dutch in something.
 |
| drawer slip(s) |
I didn't glue up the sides and front. I am waiting until I get the length of the sides determined and get the back attached. I was going to over size the two drawer slips but the shop clock said it was almost 1600. Been a while since I got into a groove and time just zoomed on ahead of me. Killed the lights here and I'll get back to this in the AM.
accidental woodworker
back home......
Went to Express care at the VA thursday for the cough which is beyond sucking pond scum now. The Nurse practitioner said I had pneumonia and she sent me to the ER. At the ER they drew blood and I had a CT scan. The results according to the radiologist were I didn't have pneumonia but there was a nodule on my left lung.
The doc explained the procedures to determine exactly what the nodule was. The prognosis was most likely cancer with the tests to determine whether it was benign or malignant. Not a good list of choices. From this I got admitted to 6B supposedly to have a bronchoscopy.
Long story short, the pulmonologist reviewed the CT scan and said it was most likely pneumonia. My blood work, white blood count, and blood cultures all came back normal he said. So he prescribed two antibiotics to treat the pneumonia for seven days. He also scheduled a follow up CT Scan to check/compare the nodule on my left lung next year.
Fingers crossed that it isn't the dread 'C' word. Lung cancer doesn't have a high cure rate. Either way the wind blows I've made my peace with it. What I do then depends on the results of the CT scan on Jan 16th.
No restrictions were placed on me so I'll be back in the shop in the AM. There are a few projects on the to do list I want to tackle. The top two are desks for the grandkids.
I managed to squeeze in an hour or so on Thursday morning in the shop before I went to the VA Express care.
 |
| chip blowout |
This is the bottom but the side view will be visible. The chip void I had to fill extended down from the top about a 1/4". Way to big to ignore. Shouldn't be too bad once I get some shellac slapped on this.
 |
| hmm...... |
I honestly can't tell the difference between cherry sawdust and hide glue from pine sawdust and hide glue. Both of them look about the same color brown. Although it does match up better with the end grain tails.
Can't wait to plane/sand the carcass to see how it looks.
accidental woodworker
Shop pencils, part 3

Took a day off...
This is Mrs. Ralph. He'll be back soon as he's been busy all day with some medical stuff. Meanwhile, happy woodworking to all!
Guild of Master Craftsmen
As of today. a member of the Guild of Master Craftsmen.
